
Snow season is unforgiving for property preservation vendors. Unlike a grass cut or a lock change, snow work arrives all at once, on the worst driving days of the year, with a clock ticking on every order. What gets you paid is the same thing that gets you paid on every other order type: the right scope, done completely, and proved with photos a reviewer can approve without guessing.
Snow removal work orders also carry a risk other orders do not. A missed walkway is not just a rework — it is a slip hazard at a vacant property, a potential liability claim, and a fast route to losing a client. That is why snow work rewards vendors who treat it as a system, not a side job: a trigger rule, a set route, a fixed photo sequence, and a back office that keeps uploads and invoices current while the storms keep coming.
This guide covers how snow removal work orders actually work for P&P vendors: what the scope usually includes, how trigger depths and local rules decide whether you go out at all, the photo set that gets approvals, the bidding mistakes that cost money, and how to run snow season without letting the rest of your work fall behind.
What a Snow Removal Work Order Usually Covers
A snow removal order for a vacant or REO property is about access and safety. The client wants the property cleared so agents, inspectors, contractors, and buyers can reach it safely, and so it stays compliant with local rules.
The typical scope includes:
- Driveway: cleared wide enough for vehicle access, usually down to pavement where the order requires it.
- Walkways and sidewalks: the front walk, the path to the entrance, and the public sidewalk in front of the property where the order or local ordinance requires it.
- Steps and porches: cleared and treated, because steps are where falls happen first.
- De-icing: salt or ice melt applied to every surface that was cleared, to stop meltwater refreezing into ice.
- Access paths: a clear route to utility meters, lockboxes, and side or rear entrances the client needs to use.
Read the order before you roll. Some orders cover only the driveway and front walk; others require the full sidewalk, the rear path, or the whole parking area at a multi-unit property. Some clients set a trigger depth, while others order a one-time clear after a named storm. Doing the “usual” job instead of the ordered job is how a vendor clears the wrong area and earns a rejection.
Local rules matter here more than on most order types. Many cities require sidewalks to be cleared within a set number of hours after snowfall ends, and HOAs often have their own deadlines that override a client’s general guideline. Where a local ordinance or HOA rule is stricter, follow it — and note the reason for service (access, local ordinance, or both) when you bid or report, because reviewers ask for it.
Trigger Depths: When Do You Actually Go Out?
The single most confusing part of snow work for new vendors is the trigger: the snowfall depth that sends crews out. A trigger is not a suggestion. It is the line between “go” and “do not go,” and billing a visit that never triggered is one of the quickest ways to a chargeback.
Common patterns vendors see:
- Per-storm orders: the client issues an order after a storm, with a defined scope and deadline. You go once, clear, treat, photograph, and upload.
- Trigger-based recurring service: the client authorises service whenever accumulation passes an agreed depth — commonly 2 inches, sometimes 3 or 4. You monitor conditions, document the depth, and go when the trigger is met.
- On-call / as-needed orders: the client requests a clear for a showing, an inspection, or an ordinance deadline. The order itself is the trigger.
Whatever the model, document the condition that justified the visit. A before photo showing snow depth, a note stating the measured accumulation, and the date and time of service turn a debatable visit into a defensible one. If you arrive and the snow has melted, blown clear, or fallen short of the trigger, photograph that and report it rather than clearing a bare driveway for a photo. Reviewers would rather see an honest no-service report than a staged one.
Before the Season: The Setup That Saves January
Snow season punishes vendors who improvise. Do most of your preparation before the first flake:
- Route by geography, not by order number. Group snow properties into tight clusters so a crew can work a loop without crossing town between stops. Rebuild the route when new properties are added, and keep a backup driver for every route — storms and sick days arrive together.
- Pre-walk your properties where you can. Note where snow can be piled without blocking parking, sightlines, drains, or the neighbour’s drive. Mark obstacles now: low curbs, landscape edging, irrigation heads, and raised utility covers. A pile in the wrong place is the most common snow complaint, and it is entirely preventable.
- Stock before the storm, not during it. Salt and ice melt sell out fast once a forecast firms up. Keep de-icer, shovels, and a snow blower or plow in working order in every truck that runs a snow route, and keep a spare shovel.
- Agree on snow placement in advance. Where the order does not say, ask the client or note your plan in the report: piles clear of walkways, entrances, fire lanes, and drainage paths. Never pile snow against the house where meltwater can run back toward the foundation, and never block a sidewalk to clear a driveway.
- Know your surfaces. Salt damages some surfaces and plantings, and some clients or HOAs restrict which de-icing products can be used. If the order specifies a product type, use it; if it does not, use a product suited to the surface and note what you applied.
The Snow Removal Checklist, Step by Step
1. Arrival: Prove the Condition You Found
Before clearing anything, photograph the property as you found it: a wide front shot showing overall accumulation, the driveway, walkway, steps, and porch before clearing, a depth reference where possible (a ruler or boot beside the snow), and any pre-existing damage. These arrival photos justify the visit.
2. Clear in Priority Order
Work in the order that restores safe access fastest: entrances and steps first, then walkways and sidewalks (cleared to full width where the order requires it, not just a narrow path), then the driveway, pushing snow to the agreed pile location — never into the street where local rules forbid it, and never onto a cleared sidewalk. Clear down to pavement where the order or ordinance requires it; a thin layer of packed snow left on a walk refreezes overnight into the ice sheet the client paid you to prevent.
3. De-Ice Every Cleared Surface
De-icing is not an optional extra — on most orders it is part of the scope, and skipping it is a rejection reason in its own right. Apply salt or ice melt evenly to walkways, steps, porches, and driveways after clearing, and photograph the application in progress and the treated surface afterwards.
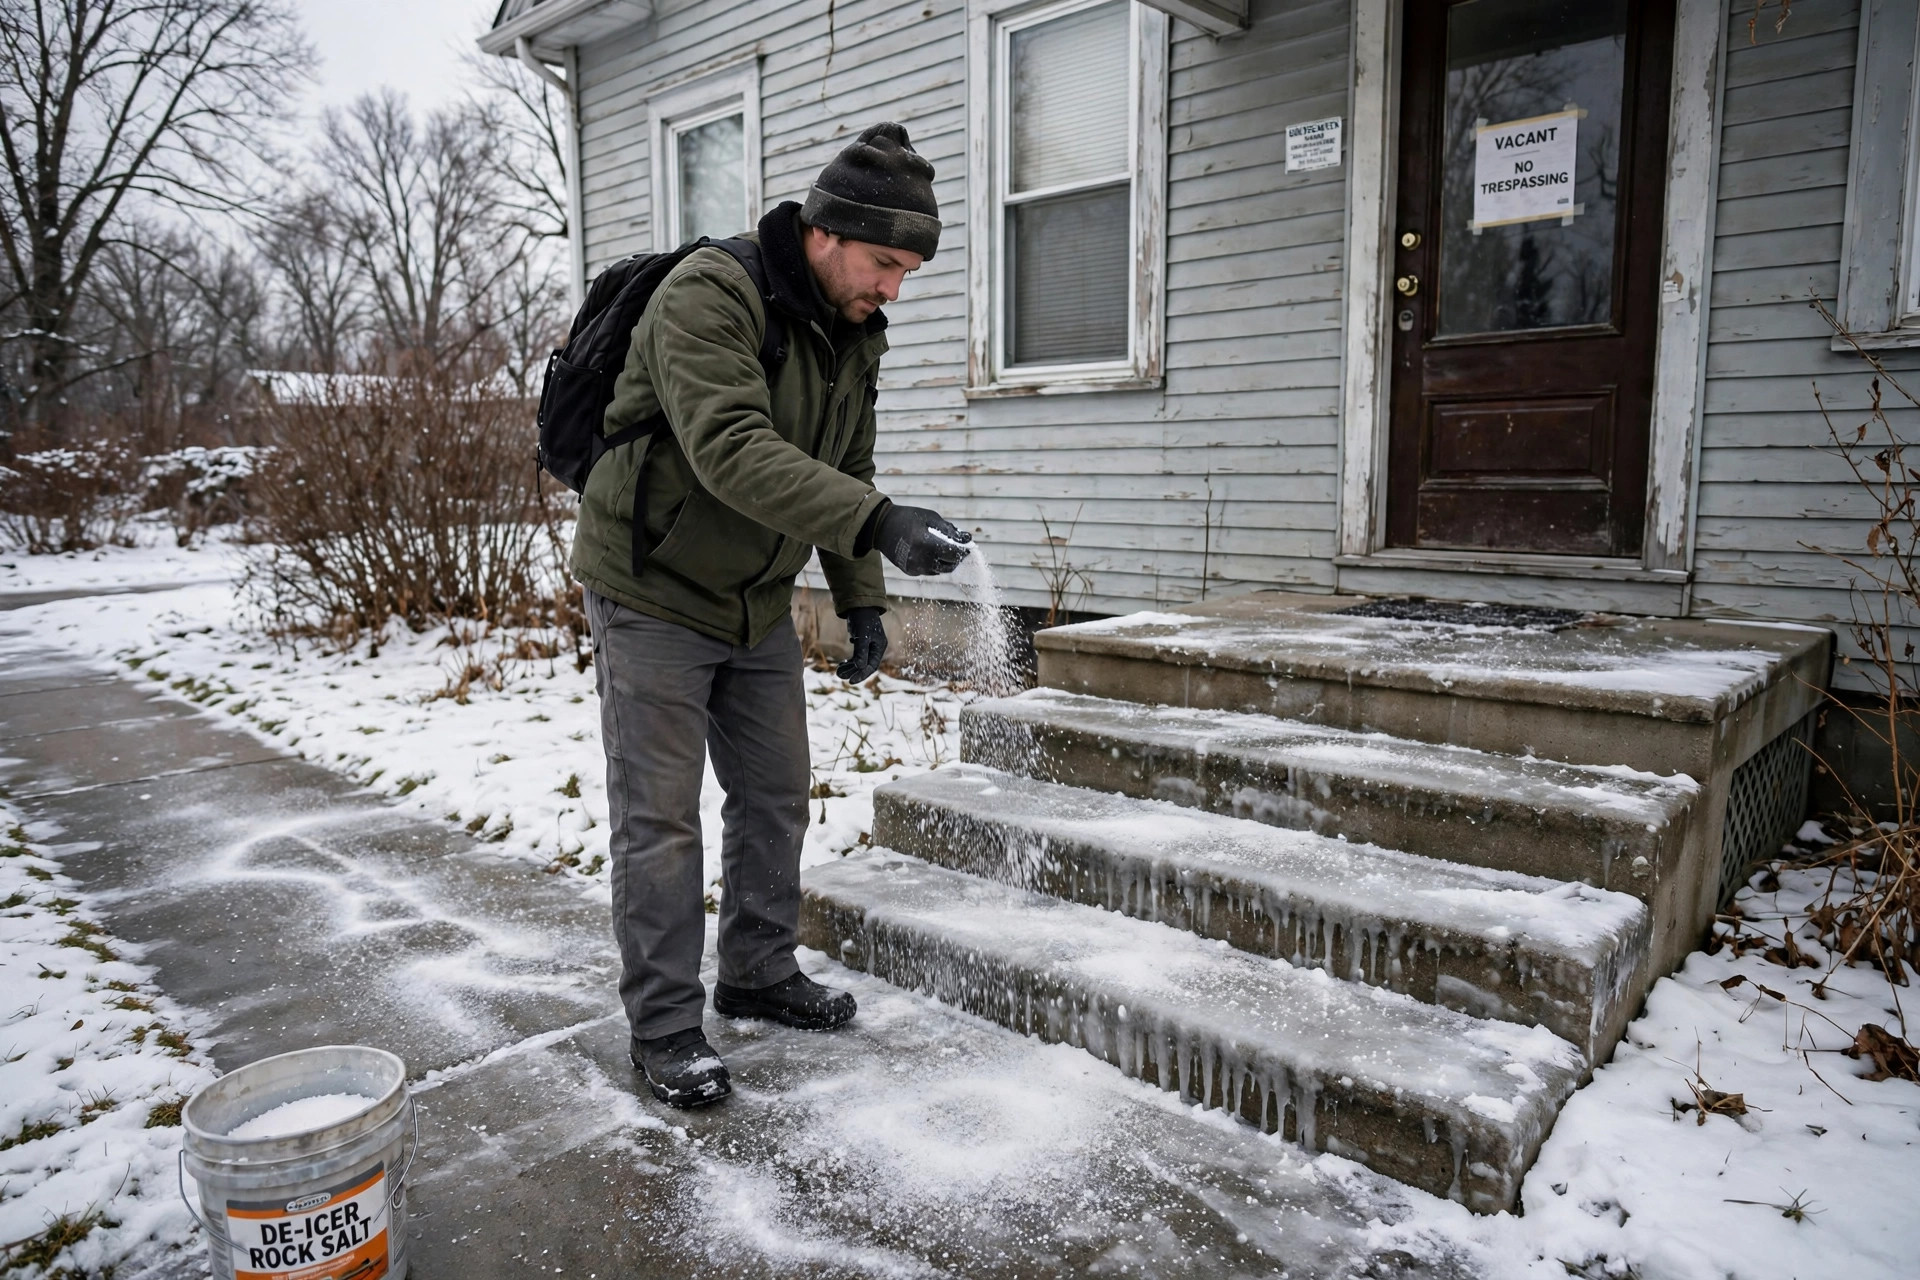
Apply at a sensible rate for the surface and temperature, and note the product used. Over-salting wastes material and damages surfaces; under-salting leaves a walk that looks cleared and behaves like a rink. If temperatures are far below the product’s effective range, say so in your notes.
4. Secure and Photograph the Finished Property
Before you leave, check that all cleared areas are passable and no pile blocks an entrance, a drain, or a sightline; confirm the property is secured and the lockbox closed; take completion photos of every area in scope showing cleared pavement and treated surface; and note anything you could not complete and why. A documented exception is manageable; an undocumented gap reads as skipped work.
Photo Documentation: The Set That Gets You Paid
For snow orders, the photos are the deliverable, just as they are on a winterization work order. A reviewer cannot revisit yesterday’s storm, so your photo set has to recreate the visit completely:
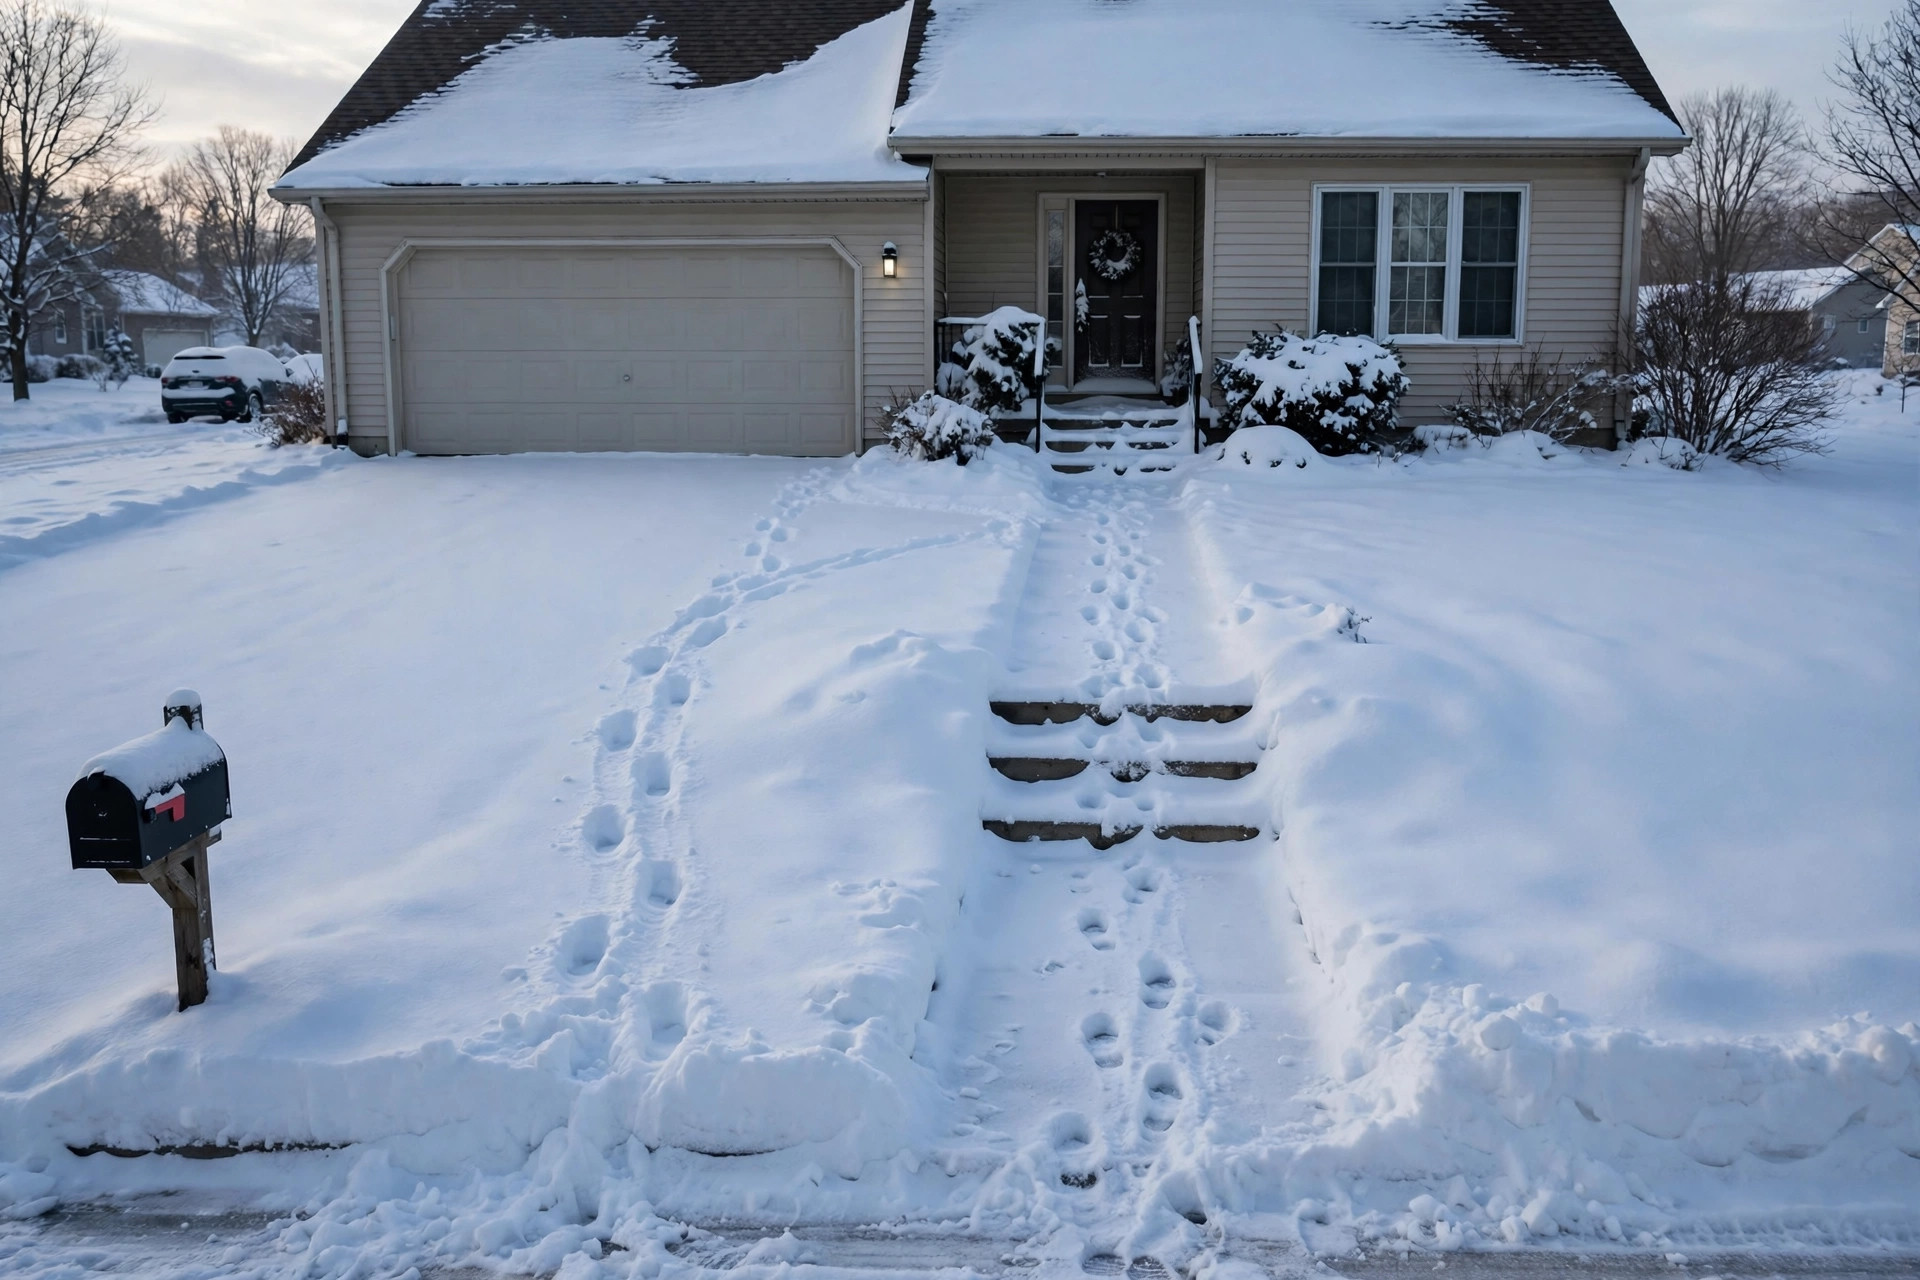
- Before photos — wide front view, driveway, walkway, steps, with visible accumulation.
- During photos — clearing in progress and de-icer being applied. These prove the work happened, not just that the property ended up clear.
- After photos — every cleared area, down to pavement, with treated surfaces visible.
- Context shots — each close-up should include enough of the surrounding area that the reviewer can tell which part of the property it is. A close-up of bare concrete proves nothing on its own.
Order your photos logically when uploading, and keep the same sequence on every job. Reviewers process dozens of storm orders a day; a set that reads like a story — before, during, after — gets approved faster than a jumbled dump of images. If your platform requires a specific photo sequence, follow it exactly.
Time stamps matter more on snow work than on most orders, so upload promptly and keep your camera’s date and time accurate.
The 5 Mistakes That Trigger Snow Removal Rejections
- Clearing without a trigger. A visit with no qualifying accumulation, no order, and no ordinance deadline is a bill the client will push back on. Document the trigger every time.
- Skipping the de-icing step. A cleared-but-untreated walk refreezes, and the reviewer — or a fall report — will find it. Photograph the treatment, not just the cleared surface.
- Partial clears. Clearing the driveway and skipping the walk, or clearing a narrow path instead of the full walk width, reads as incomplete scope.
- Snow piled in the wrong place. Piles blocking parking, sidewalks, drains, or sightlines generate complaints fast. Agree pile locations before the season.
- Before photos missing or useless. A photo set that starts with an already-cleared driveway cannot prove a storm visit happened. Take before photos first, every time.
Each of these is a routine failure, not a skill failure. A checklist and a fixed photo order prevent all five.
Snow Bids: Line Items Vendors Get Wrong
Snow bids fail in predictable places. Getting these right protects your margin and your approval rate:
- Define the trigger and the visit count. Is this a single clear or recurring service at a set depth? State the trigger, the scope, and the number of visits the price covers — a bid priced as one visit but performed as four is a loss.
- Measure the area honestly. Bid the actual driveway, walk, and sidewalk dimensions — length, width, and square footage where the form asks for it — not a guess from the listing photo.
- Separate de-icing from clearing where the price list does. On many client price lists, plowing or shovelling and de-icing are separate line items with separate allowables. Bundling them, or billing de-icer never applied, invites a reduction.
- State the method. Plow, snow blower, shovel, or a combination — and the de-icing product. Bid forms commonly ask for the reason for removal, the location cleared, the dimensions, and the method; a bid missing any of those waits for a revision request.
- Price the return visit. Heavy storms and refreeze sometimes need a second pass. Confirm whether the client’s price list covers re-service before you assume it does, and note storm conditions in the original report so a second visit reads as weather, not rework.
Check margin before the season with our free property preservation job profit calculator — drive time in bad weather, materials, and paperwork included.
Running Snow Season Without Losing the Rest of Your Business
Snow season compresses a huge share of winter volume into a handful of storm weeks, on top of your ordinary work — grass cuts, lock changes, debris jobs, and inspections do not pause for a blizzard. Vendors who scale by rushing see rejection rates climb in February. A steadier approach:
- Protect the upload queue. The bottleneck in snow season is rarely the field — it is photo uploads, bid entries, and invoices piling up after long storm days. Crews that upload the same night invoice faster and spot rejections while there is still time to fix them.
- Batch by geography and daylight. Run snow routes in tight loops, and schedule non-snow work around storm windows rather than through them.
- Track rejection patterns weekly. If the same issue keeps coming back — missing de-icer photos, partial walks, wrong pile spots — fix the checklist once instead of reworking it ten times.
If paperwork is eating field hours, work order processing support can take bid entry, uploads, and invoicing off your plate — see our services, structured around pay-per-task work with no contract and no monthly minimums. Compare also our grass cut work order guide: the documentation discipline is the same, even though the season is the opposite.
FAQ
How much snow triggers a property preservation snow removal order?
It depends on the client and the order. Many clients set a trigger of 2 to 4 inches, while others order a one-time clear after a named storm or for access, a showing, or an ordinance deadline. Always check the specific order: the trigger, scope, and deadline are what you bill against.
Do I need before photos for a snow removal work order?
Yes. Before photos showing the accumulation justify the visit — they prove the trigger was met and the scope was needed. Without them, a reviewer cannot tell whether the property needed clearing, and the order is far more likely to be questioned.
Is de-icing required, or is clearing the snow enough?
On most P&P snow orders, de-icing is part of the scope, not an extra. Salt or ice melt must be applied to every cleared surface to prevent meltwater refreezing into ice. Photograph the application, note the product used, and do not treat a cleared-but-untreated walk as finished.
What happens if snow falls again after I clear a property?
That is normal during a long storm, and it is why many clients use trigger-based recurring service: each new accumulation past the trigger justifies another visit. Document it with fresh before photos and report it as a new service event, not rework.
Can I bill for a visit if the property was already clear when I arrived?
Only if the order authorises it. If the trigger was not met, photograph the condition and report a no-service visit honestly. Billing a full clear for a property that needed none is a chargeback risk.
The Bottom Line
Snow removal work rewards preparation more than speed. Agree triggers and pile spots before the season, clear in priority order, treat every surface you clear, and upload a photo set that tells the whole story — before, during, and after. Vendors who do that get paid faster, avoid chargebacks, and earn more volume when clients assign the next storm.
If the paperwork side of snow season — bids, uploads, invoices — is slowing your crews down, AssetSure Processing can help. We have processed 67,200+ work orders since 2013 with 99.8% QC compliance, under-one-hour turnaround, and 24/7 coverage, on a pay-per-task basis with no contract and no monthly minimums. See our pricing to check how the model fits your volume, or use the free checklists and calculators in the vendor toolkit on your next storm job.