
You walk into a vacant property on a cold January morning and hear it before you see it: water running somewhere it should not be. A pipe froze overnight, split open, and has been pouring water into the kitchen for hours. The floor is soaked, the drywall is sagging, and the servicer wants photos, a bid, and a plan — today.
Freeze damage work orders pay well. They also go wrong more often than almost any other order in this business. The difference between a freeze job that pays in full and one that ends in a chargeback is rarely the repair itself. It is the paperwork: what you photographed, what you wrote down, and how you built the bid. Get those right and the order is straightforward. Get them wrong and you can end up doing the work twice — once for free.
This guide walks through the whole job the way a servicer sees it: what to do first, how to document the damage so your photos hold up, how to bid a freeze repair the way Fannie Mae’s own guidelines expect, and the mistakes that cost vendors money every winter.
Why Freeze Damage Is Different From Other Water Damage
A burst pipe looks like any other leak. To a servicer, it is not. Three questions decide how a freeze damage claim gets handled, and your work order has to answer all three:
- Was the break sudden? A pipe that froze and burst during a cold snap is a sudden loss. A slow leak that dripped for weeks is not. The servicer, and the insurer behind them, treats those two things very differently.
- Was the property protected? Was the heat on, or was the property winterized? If the home was supposed to be winterized and was not, someone is going to ask why.
- Did you limit the damage? Once you found the water, did you shut it off and start drying things out — or did you leave it running while you waited for approval?
Your photos and notes are the only evidence the servicer has for those three questions. If the file is thin, the default answer is the one that costs you money. That is why documentation comes first in this guide, before the wrench work.
Step 1: Stop the Water, Then Photograph Before You Touch Anything
The order matters here. Do these in sequence, not at the same time.
Shut the water off. Find the main interior shut-off valve and turn it off. If the property has freeze damage, Fannie Mae’s guidelines also require the water off at the curb. If you cannot shut off both, shut off the one you can reach and note the other one in your work order comments. Do not skip this step to take photos first — every minute of running water adds damage you will later have to explain.
Make it safe. Water and electricity do not mix. If water has reached outlets, light fixtures, or the electrical panel, stay out of that area. Shut off power to the wet section only if you can reach the breaker safely without standing in water. If you cannot, say so in the order and move on to the dry parts of the property.
Now photograph — before cleanup. This is the step vendors rush past, and it is the one that costs the most money later. Once you mop, cut drywall, or haul out wet carpet, the evidence of how bad it was is gone. Take a full round of photos and a short video first. It takes three minutes and it protects the whole job.
Take the photos through the client’s app, at the property, so they carry a timestamp and a location stamp. A photo uploaded later from a desktop does not prove when or where it was taken, and on a freeze job, when and where is the whole point. Keep the original files. Work wide to close: wide shots of each affected room first, then close-ups of the split pipe — the single most useful photo in the file — then every surface the water touched. Do not crop out the mess to make the photos look tidy. The mess is the evidence.
A short video helps too. Walk the water’s path on camera, from the burst pipe down through the rooms it reached, and talk as you go: what you see, where the water came from, what is wet. A 60-second walkthrough can settle arguments that ten photos cannot.
Photo checklist for a freeze damage order:
- Wide shot of every affected room
- Close-up of the split or burst pipe
- The water shut-off valve, in the off position
- Every wet surface: floors, walls, ceilings, baseboards
- Damaged materials before you remove them
- The thermostat reading, if the heat was on
- The winterization tag or notice, if one is posted
- A video walkthrough of the water’s path
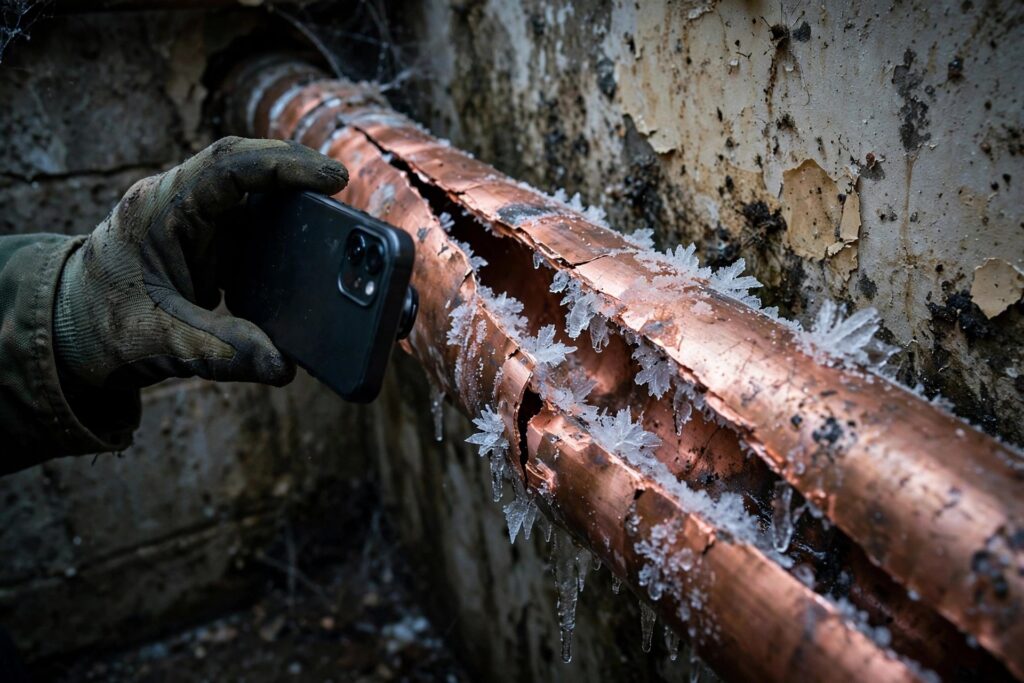
If you already know the property’s winterization history, write it down in the order now. Fannie Mae’s own preservation guidelines require freeze damage bids to list every date the property was winterized. If you winterized it yourself, you have those dates. If another vendor did, say so and give the dates if you can find them on the property. A bid with no winterization history reads like a guess, and servicers treat it like one.
Step 2: Figure Out What Actually Froze — and What Else Is Damaged
A burst pipe is rarely the only problem. Water travels, and it hides. Before you write the bid, walk the whole property and check the places water likes to go.
Start at the burst and follow the water down. Water runs downhill and soaks into everything on the way: subfloor, drywall, insulation, the ceiling of the room below. Press baseboards and the bottom of drywall — if they are soft or swollen, the water got in. Look for sagging ceilings on the floor below the leak. Check the rooms next to the burst, not just the one with the visible water.
Then check the rest of the plumbing. A hard freeze almost never takes out just one pipe. Run water through every fixture and watch every joint and fitting in the area. Check pipes in the spots that freeze first: exterior walls, attics, crawl spaces, and garages. A second split you miss on the first visit becomes a second trip and a servicer wondering why you did not catch it the first time.
Also check for a frozen pipe that has not burst yet. If a fixture has no flow at all, the line may be frozen solid. That is a different job from a burst — a controlled thaw — and it needs to be in the bid as its own line, not buried inside the repair. If you find one, note exactly which fixture lost flow and where you think the freeze is.
Do not start repairs before the bid is approved. This is the rule that burns vendors most often on freeze jobs. The water is off, the damage is documented, and the instinct is to fix it now while you are standing there. But freeze repairs are bid work, and starting before approval is how you end up arguing about a price after the work is already done. Document, bid, wait for the approval, then repair. The only exception is emergency mitigation — stopping the water, removing standing water, and drying — which protects the property and which servicers expect you to do right away.
Step 3: Build a Bid Servicers Actually Approve
A freeze damage bid is not one number. It is a story in line items, and each line answers a question the reviewer will ask. Write it so a person who has never seen the property can follow it.
Lead with the facts, not the price. The first lines of the bid should state what happened: the date you found the damage, the cause (frozen pipe), the location of the burst, and the winterization dates for the property. Then the water status: off at the main and the curb, or off at the main with the curb noted as inaccessible. If the lines need capping, say so here.
Break the work into clear lines. A bid that says “repair freeze damage — $1,850” will get kicked back. A bid that says “replace 6 feet of split copper supply line in kitchen wall; remove and replace 12 square feet of wet drywall; dry out with dehumidifier for 3 days; re-winterize plumbing on completion” gets approved, because the reviewer can see what the money buys. Use the same plain language in the bid that you would use talking to the homeowner. No jargon, no padding.
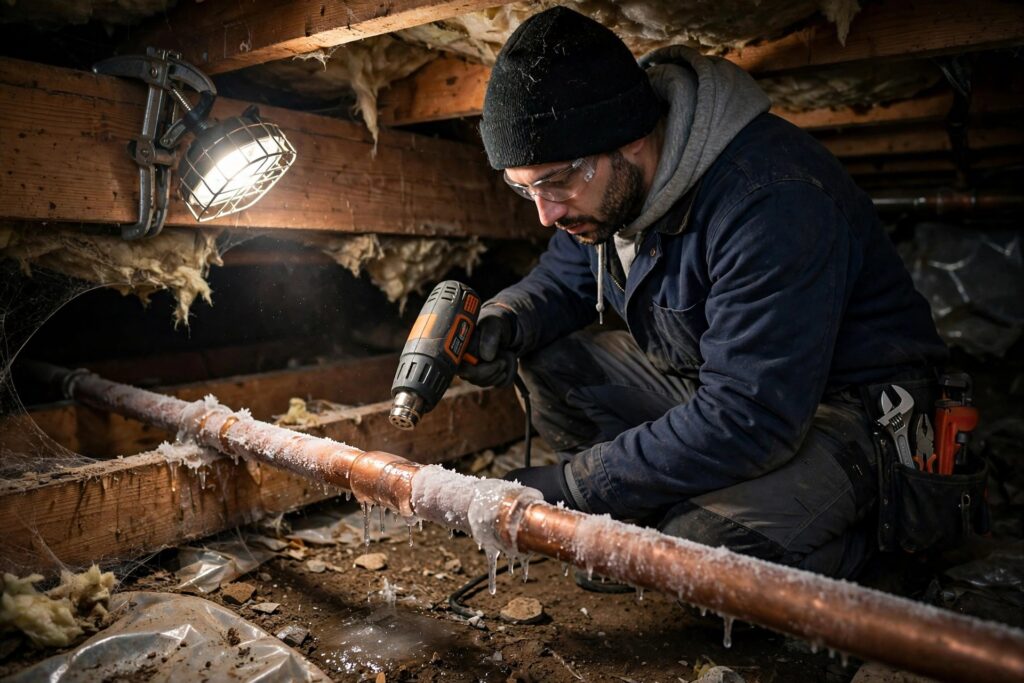
Price the thaw separately. If a line is frozen but not burst, a controlled thaw is its own job. Thaw it with a heat gun or a heating wrap, working from the open faucet end back toward the blockage so the melting water has somewhere to go. Keep the faucet open while you work. Never use an open flame or a torch — it is a fire risk, and it can flash trapped water to steam and blow the pipe apart. Thawing from the wrong end traps pressure behind the ice and can cause the very burst you are trying to prevent. After the thaw, run the line at full pressure and check every joint for cracks or weeping. Ice weakens pipe walls, and a joint that looks fine at low pressure can start leaking once the line is fully pressurized. Finding that leak on the same visit is a ten-minute fix. Finding it on the next visit is a new order and an unhappy client. Put the thaw in the bid as its own line with its own price.
Add the re-winterization. Once the plumbing is repaired, the property needs to be winterized again — drained, blown out, antifreeze in the traps and toilets. If you leave a repaired property unwinterized in January, the next cold night undoes your work. Put the re-winterization in the bid as a line, not as an afterthought, and complete it the same day as the repair if you can.
Note the $300 rule. On Fannie Mae properties, if there is minor plumbing damage that is stopping a winterization and you can fix it for under $300, you are generally authorized to make that repair so the winterization can be completed. That is a narrow exception for small fixes that unblock a winterization — it is not a green light to do a full freeze repair without approval. If your repair is bigger than that, bid it and wait.
Submit fast. Some clients require the invoice within 24 hours of completing a winterization, and freeze bids have their own clocks. Do not sit on a freeze bid for two days. The property is sitting with its water off in winter, and every day of delay is a day the servicer has to explain to someone. Submit the same day you inspected, with the photos attached. For a refresher on keeping submissions clean the first time, see our guide on improving your PPW submission acceptance rate.
Step 4: Finish the Job So It Stays Finished
Approval comes back, you do the repair, and the job is not over yet. The closeout is where freeze orders get charged back, so treat it like part of the work, not paperwork after the work.
Photograph the repair the same way you photographed the damage. Wide shots of each repaired area, close-ups of the new pipe and joints, the re-winterization tag in place. The servicer needs to see the finished state as clearly as they saw the damage. If a reviewer opens your closeout and sees two photos of a wall, they will ask for more — and every round of corrections pushes your payment back.
Record moisture readings if you dried the space. If you ran fans or a dehumidifier, note the readings over the days you dried, not just a single number on the last day. A servicer who sees readings dropping day by day trusts the dry-out. Keep the mitigation invoices too — they go in the file with everything else.
Keep damaged materials until the file is closed. Photograph anything you remove before you dispose of it, and keep the failed pipe section if you can. On a disputed claim, the actual split pipe is better evidence than any photo of it. If you must dispose of materials, photograph them first and note the disposal in the order.
Confirm the winterization held. Before you leave, check that the re-winterization is intact: water off, lines drained, antifreeze in place, tag posted. Some clients hold the vendor liable for the plumbing once a winterization is reported complete — so if you find damage at the time of winterization, report it with a written repair bid the same day. Reporting late is how a vendor ends up owning damage they did not cause.
5 Mistakes That Cost Vendors Money on Freeze Jobs
1. Cleaning up before photographing. The moment you mop and cut drywall, the evidence of scope disappears. Photos first, cleanup second. Every time.
2. Bidding one lump sum. “Repair freeze damage” with a single number gets kicked back or negotiated down. Line items get approved. Break the work apart.
3. Starting repairs before approval. Emergency mitigation is expected. Full repairs before approval are not. Do the repair early and you may be doing it for free.
4. Missing the second split. A hard freeze rarely breaks one pipe. Check every line in the cold spots before you leave, or you will be back — and the servicer will remember.
5. Forgetting the winterization history. Fannie Mae’s guidelines require freeze damage bids to list each date the property was winterized. A bid without that history looks incomplete, and incomplete bids sit in the queue while complete ones get approved. Keep your own record of every winterization you complete. Our winterization work order checklist covers the full process, step by step.
What Freeze Season Means for Your Winter Work
Freeze damage is seasonal work, and it arrives in waves. The first hard freeze of the season produces a flood of orders, and the vendors who handle them well get more of them. A clean freeze job — fast documentation, a complete bid, a proper closeout — is one of the fastest ways to prove yourself to a client. It shows you can handle the hard orders, not just the grass cuts.
If you are building your winter routine now, pair this guide with our winterization checklist and our guide to documenting common property damage. And if a freeze order does come back as a chargeback, do not guess at the response — our guide to preventing and fighting chargebacks walks through exactly what to do.
Freeze work is not hard work. It is careful work. The pipe is the easy part. The file is the job.
How AssetSure Helps With Freeze Damage Orders
Freeze damage orders are paperwork-heavy: photos to sort, bids to write, winterization dates to track, submissions to chase. That is the part that eats your evening after a long day in the cold. AssetSure Processing handles the back office for property preservation vendors — work order processing, bid preparation, and submission — so the file is complete, correct, and submitted the same day. We have processed more than 67,200 work orders since 2013 with 99.8% QC compliance, and we turn orders around in under an hour, 24/7, with no contract and no monthly minimums. If freeze season is burying your office in paperwork, see how we work on our work order processing page, or look at what it costs on our pricing page.
Frequently Asked Questions
What should I photograph first at a freeze damage property?
Photograph the damage before you clean up anything. Start wide — every affected room — then close in on the split pipe itself. Add the shut-off valve in the off position, every wet surface, the thermostat reading, and the winterization tag if one is posted. Take a short video walking the water’s path. Submit the photos through the client’s app so they carry a timestamp and location stamp.
Can I start repairing freeze damage before the bid is approved?
No — not the full repair. Emergency mitigation is expected: shut the water off, remove standing water, and start drying. But the plumbing repair itself is bid work, and doing it before approval risks not getting paid for it. Document the damage, submit the bid the same day, and repair once it is approved. The one narrow exception is a small fix under $300 that is blocking a winterization on a Fannie Mae property.
What must a freeze damage bid include?
Each date the property was winterized, the water status (off at the main interior supply and at the curb, or why one could not be shut off), the location and cause of the damage, and the repair broken into clear line items — pipe replacement, drywall, drying, and re-winterization as separate lines. A single lump-sum number usually gets kicked back.
How do I thaw a frozen pipe safely?
Use a heat gun or heating wrap — never an open flame or torch. Work from the open faucet end back toward the blockage so melting water has a path out, and keep the faucet open while you work. After the line thaws, run water at full pressure and check every joint for cracks or weeping before you call it done. Thawing from the wrong end can trap pressure and burst the pipe.
Who pays if a property freezes after I winterized it?
It depends on the record. Once you report a winterization complete, some clients hold you liable for the plumbing unless you reported existing damage with a written repair bid right away. That is why you must report any damage you find at the time of winterization the same day, with a bid attached, and keep your own record of every winterization date. If the freeze happened because a prior winterization failed or was never done, the history in your file is what protects you.